
LITTLE LINES. BIG IMAGINATION.
How to Draw a Ladybug, step by step
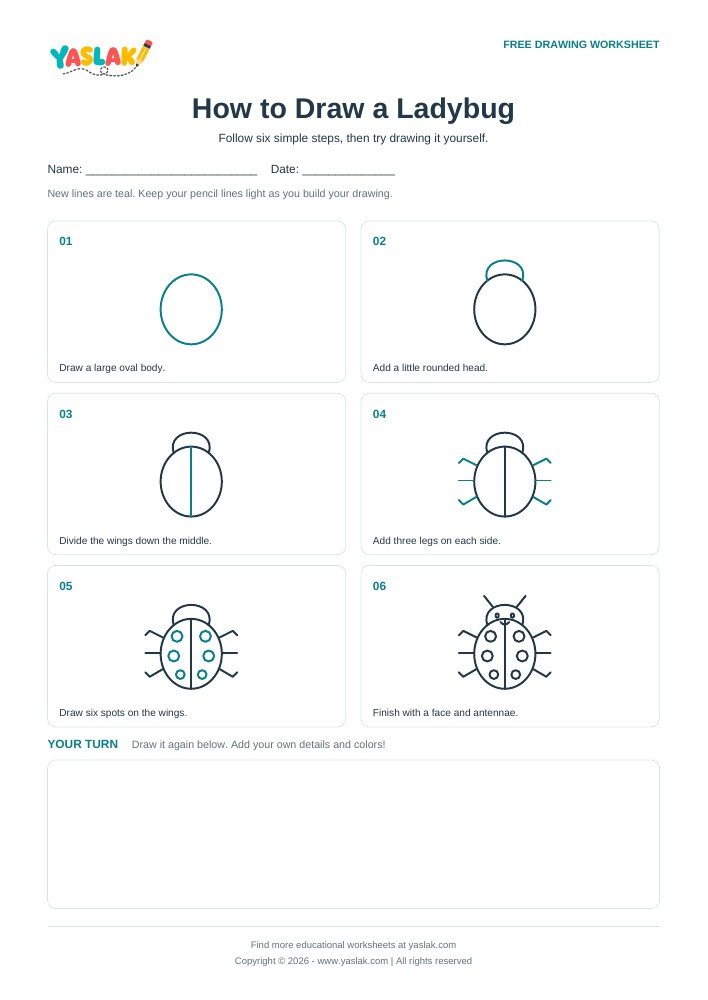
Follow the six pictures below. Add the teal lines at each step, then use your printable worksheet to practise.
6 simple stepsFree PDF downloadsSpace to practise

One shape at a time
Steps 1-5 highlight the new lines in teal. Step 6 shows your finished drawing.
STEP 1

STEP 2

STEP 3

STEP 4

STEP 5

STEP 6

READY FOR A LITTLE PRACTICE?
Take the drawing to paper.
Your free A4 PDF includes all six steps and a blank space for your own drawing. The YASLAK logo is at the top left and the copyright is at the bottom.
Download free PDF ↓1 page · A4 · 90 KB · No account needed
Find more educational worksheets at yaslak.com
Copyright © 2026 - www.yaslak.com | All rights reserved