
LITTLE LINES. BIG IMAGINATION.
How to Draw an Owl, step by step
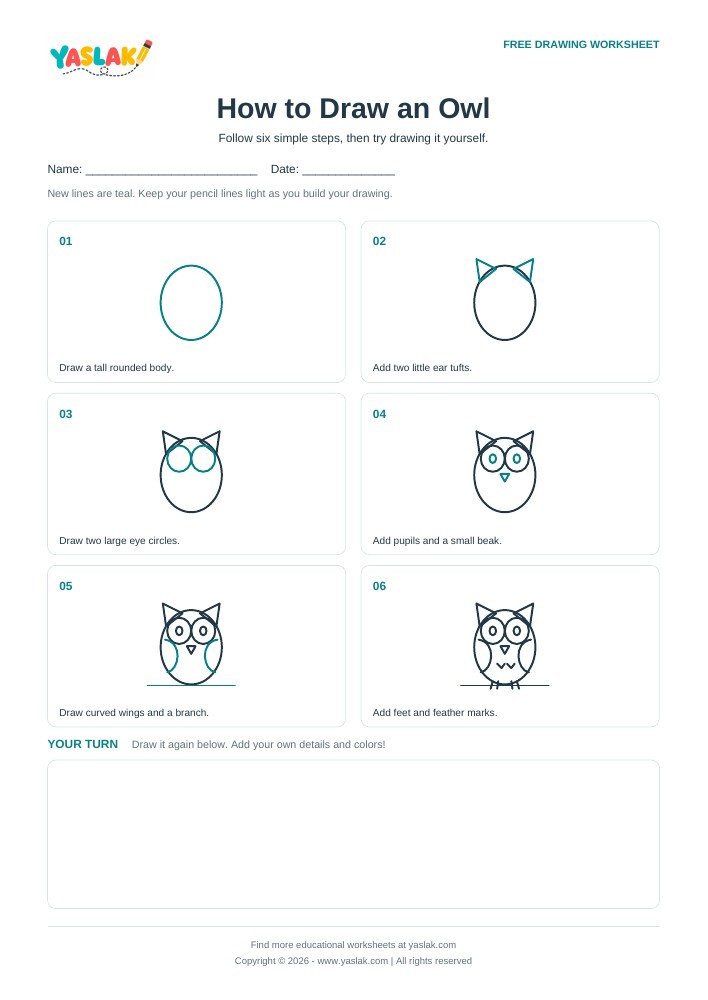
Follow the six pictures below. Add the teal lines at each step, then use your printable worksheet to practise.
6 simple stepsFree PDF downloadsSpace to practise

One shape at a time
Steps 1-5 highlight the new lines in teal. Step 6 shows your finished drawing.
STEP 1

STEP 2

STEP 3

STEP 4

STEP 5

STEP 6

READY FOR A LITTLE PRACTICE?
Take the drawing to paper.
Your free A4 PDF includes all six steps and a blank space for your own drawing. The YASLAK logo is at the top left and the copyright is at the bottom.
Download free PDF ↓1 page · A4 · 90 KB · No account needed
Find more educational worksheets at yaslak.com
Copyright © 2026 - www.yaslak.com | All rights reserved